How to create a video from a panoramic image
This tutorial describes a basic workflow how to set up and animate a
scenery to create a playable movie from a panoramic image with the help of
Daz'
Bryce 3D. The workflow can also be used by 3DS Max, Maya, etc.
The basic idea of this tutorial is:
- project a panoramic image inside a sphere
- position a camera in the middle of the sphere
- animate the camera
- render the animation
Part one: Scene setup
| Select "File" - "New Document" and enter the dimensions of your
movie. (For smaller resolutions you can magnify your working place) |
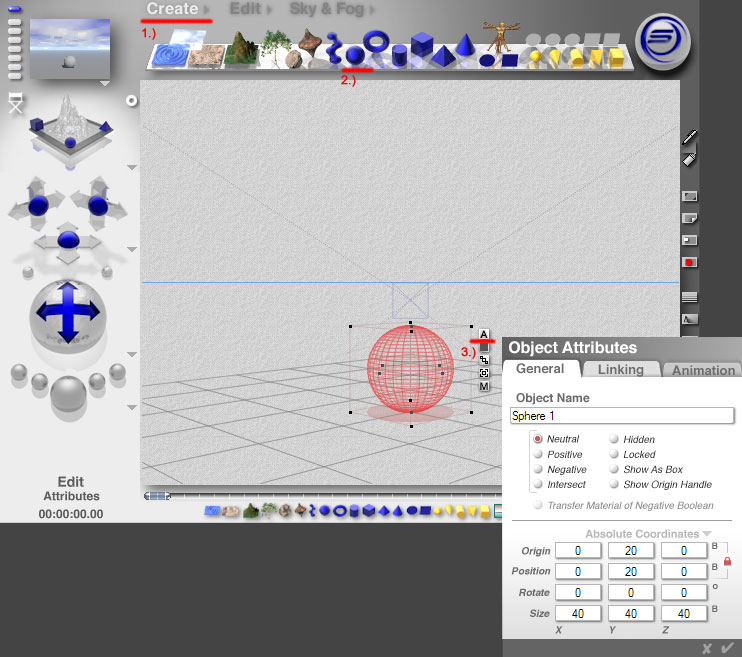
Now we will create the sphere in which the panorama will be
projected.
- Click "Create Sphere" A wire-framed sphere will
appear.
- Select it by clicking on it and select the Object Attibutes.
Set Origin and Position. Remember the values as you will also need
them later in this tutorial!
Also, set x,y,z-size of the sphere.
- Close the "Object Attributes" window.
|
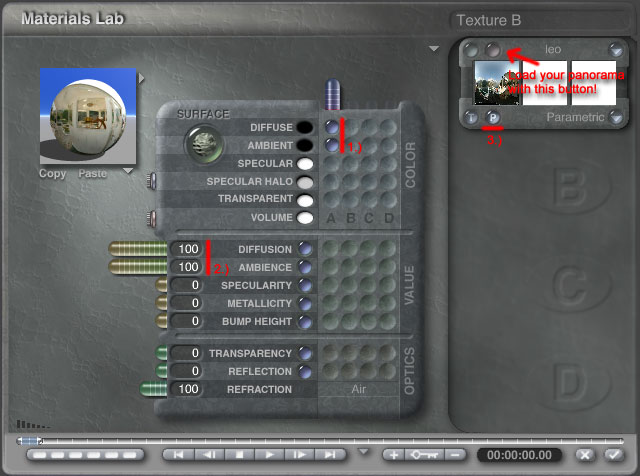
| Next, we will project the texture on the sphere. IMPORTANT!
As we will use the panorama inside the sphere you have to mirror your
panorama first!
- To open the "Materials Lab", click on the small "M" on the
right side of the object.
- Activate Diffuse and ambient, set both to 100%
- Activate the image texture mode by clicking the "P" on the
right and select your panorama. Don't forget to reset the alpha
channel! Also, check if you have selected
the right projection type for the image ("Parametric").
- As you can see in the preview, we have correctly bound the
image to the sphere.
Close the "Materials Lab".
|
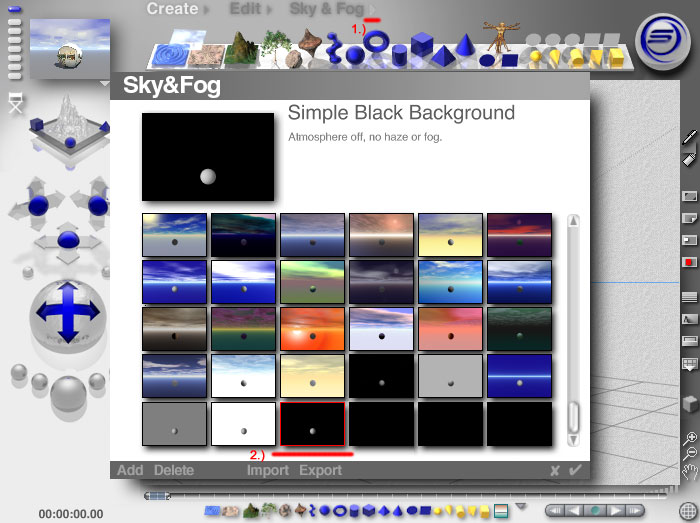
| Now we will switch off unnecessary sky rendering for faster
movie creation. There is already a setup called "Simple Black
Background" that you can use to switch off most sky and atmosphere
options: |
| We don't have to set up a light as we completely rely on the
"ambient" texture of the sphere. So the scene setup is complete. |
Proceed to Camera setup
|